.png)
Using Azure Managed Identities in containers
Handling authentication and credential management is one of the key security challenges in many projects and certainly a main differentiator between PoC / dev projects and real live production grade projects. One of the mechanisms Azure offers as solution for that problem is managed identities (thanks to my colleague Simon Fischer for introducing that to me), but because of the way you need to us them, they don’t directly work in containers running on Azure VMs. But with a small piece of code you can get past around that limitation.
The TL;DR
To get an access token, which you need to authenticate a request to an Azure resource using a managed identity, all you have to do is call a special URL: http://169.254.169.254/metadata/identity/oauth2/token. However because of the way networking in containers works, that is not possible from within a container and you won’t get an answer. To solve that, I have created a little tool which is intended to be run as Windows service on the container host and uses file based communication to wait for requests by monitoring a folder. The container puts a request file in that folder, the service requests a token and responds to the container with a response file. The container can then use that token to authenticate agains whatever Azure resource you need.
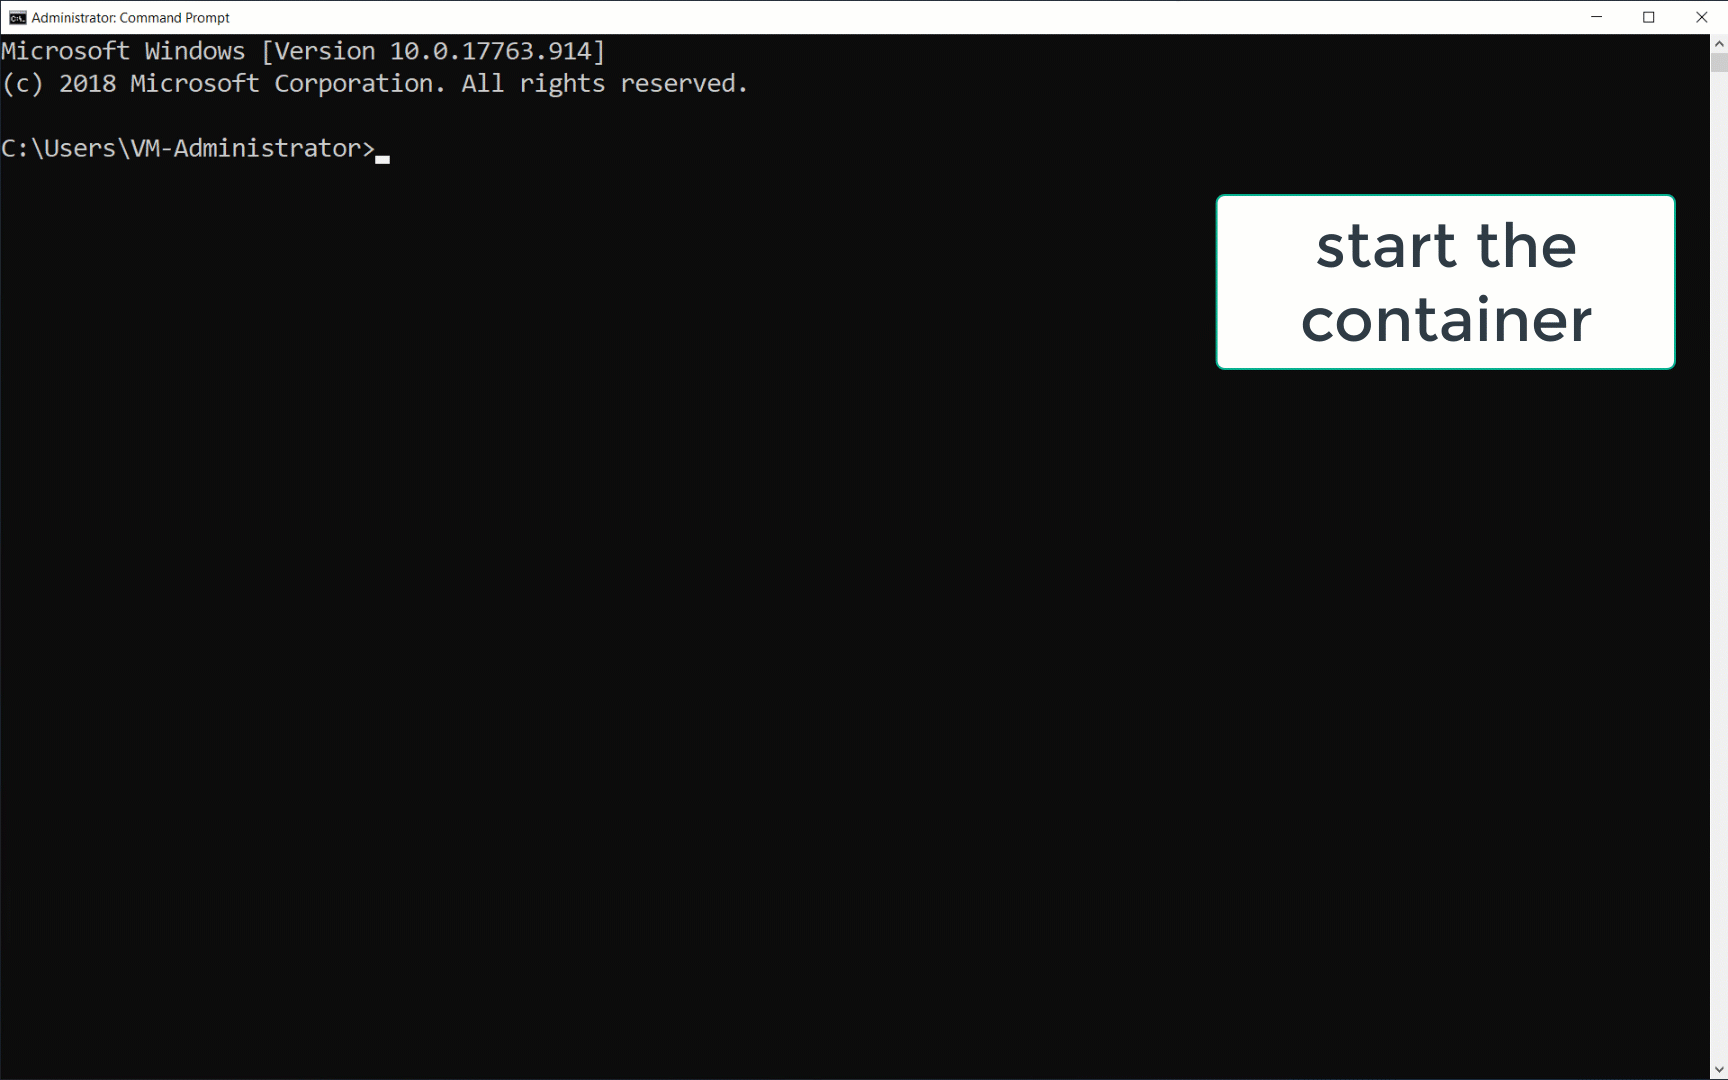
To give it a try, the first step is to click the deploy button, which sets up an Azure VM with the necessary configuration

After that has finished deploying, use RDP to connect to the VM with the username and password you provided and start a container:
1
docker run -ti -v c:\miat-helper:c:\miat-helper mcr.microsoft.com/powershell:6.2.3-nanoserver-1809
With that you get a PowerShell session inside of the container where you can the use my little helper to get an access token
1
$access_token = Invoke-Expression "c:\miat-helper\bin\client.exe --folder c:\miat-helper --resource https://management.azure.com/"
Now you can use that token to call an Azure API. As a sample, you can get some information about the VM you just generated. Make sure to replace the resource group name (miat-rg in my sample) and the virtual machine name (miat-vm) with your values:
1
2
$vmInfo = (Invoke-WebRequest -Uri 'https://management.azure.com/subscriptions/ 94670b10-08d0-4d17-bcfe-e01f701be9ff/resourceGroups/ miat-rg/providers/Microsoft.Compute/ virtualMachines/miat-vm?api-version=2017-12-01' -Method GET -ContentType "application/json" -Headers @{ Authorization ="Bearer $access_token"}).content
Write-Host $vmInfo
The result should look something like this:
Your scenario will of course vary as you will request something else, but it should give you the necessary tools to cleanly handle authentication against Azure resources from a container. I currently have no need to do this Linux based, but as my helper tool is written in .NET Core, adapting this to Linux should be trivial.
Some background on managed identities and how to use them
As I already wrote, managed identities are a mechanism to handle authentication. There are two types, but for system managed identities which I am using, the idea basically is to have something linked to an Azure resource like a VM and use this for authentication. That means that on creation of the VM, you need to enable system managed identity as switch in the Azure portal or use something like this in your ARM template:
1
2
3
4
5
6
7
8
{
    "name": "[parameters('virtualMachineName')]",
    "type": "Microsoft.Compute/virtualMachines",
    ...
    "identity": {
        "type": "systemAssigned"
    }
}
Now you have a managed identity in place, but you also need to let Azure know what that identity is allowed to do. To achieve that, you use a role assignment. In my case, I am only allowing the managed identity read access to the VM itself, which looks like this:
1
2
3
4
5
6
7
8
9
10
11
12
13
14
15
16
17
18
19
20
"variables": {
    ...
    "Reader": "[concat('/subscriptions/', subscription().subscriptionId, '/providers/Microsoft.Authorization/roleDefinitions/', 'acdd72a7-3385-48ef-bd42-f606fba81ae7')]",
    "roleAssignmentGuid": "[concat(parameters('virtualMachineName'), '/Microsoft.Authorization/', guid(uniqueString(parameters('virtualMachineName'))))]"
},
"resources": [
    ...
    {
        "apiVersion": "2018-09-01-preview",
        "type": "Microsoft.Compute/virtualMachines/providers/roleAssignments",
        "name": "[variables('roleAssignmentGuid')]",
        "properties": {
            "roleDefinitionId": "[variables('Reader')]",
            "principalId": "[reference(concat('Microsoft.Compute/virtualMachines/', parameters('virtualMachineName')), '2017-12-01', 'Full').identity.principalId]"
        },
            "dependsOn": [
            "[concat('Microsoft.Compute/virtualMachines/', parameters('virtualMachineName'))]"
        ]
    }
]
The id for the reader role is a well known one, defined here. The principal id needs to reference the system managed identity on the VM and the role assignment id needs to be nested below the resource it has access to. In this sample, this is the VM, so the id is below Microsoft.Compute/virtualMachines/<virtual machine name>. With that in place, if you make a GET request to http://169.254.169.254/metadata/identity/oauth2/token from the VM, you get an access token(technically this is a JSON Web Token (JWT)). If you then make a request against any API supporting managed identites (see the Invoke-WebRequest call in the TL;DR) and add that token to the Authorization header, it will first validate the token itself and then whether the managed identity, for which the token was issued, is indeed allowed to make that particuar request. If yes, the result is returned as you’ve seen.
If you want to learn more about managed identities, the documentation on this topic is quite good.
My little helper tool
As I wrote, calling the special URL for access tokens from within a container doesn’t work. Therefore I had to find a way for something directly on the host to request a token and give the container access to it. Doing it once on startup of the machine isn’t enough as the access token has an expiry date, you it needed to provide the token on demand. I first thought about a little REST service, but networking between the container and the host is a bit tricky, especially in a Docker Swarm scenario which is my actual goal, so I decided to go with file based communication:
The service runs as Windows service and is configured to listen on a particular folder. This happens in a script which runs on VM creation and also downloads my tool to the VM.
1
New-Service -Name "MIAT-helper" -BinaryPathName "c:\miat-helper\bin\service.exe --folder c:\miat-helper" -StartupType Automatic -DisplayName "Managed Instance Access Token helper"
The client creates a .request file in that folder with the targeted resource (Management API, Azure SQL, …) as content as you can see in the Program.cs file of the client part of my tool
1
2
3
var requestPath = $"{path}\\{guid.ToString()}.request";
...
File.WriteAllText(requestPath, resource);
The service is notified through an event, reads the file and requests a token as you can see in the AccessTokenRequestWatcher.cs file of the service part
1
2
3
4
requestedResource = File.ReadAllText(e.FullPath);
..
if (requestedResource != "") {
    var accessToken = GetToken(requestedResource);
It then creates a response file in the same class and writes the token to the file
1
2
var resultPath = e.FullPath.Substring(0, e.FullPath.LastIndexOf(".")) + ".response";
File.WriteAllBytes(inProgressPath, tokenBytes);
The client picks up the response file, reads the token and writes it to the standard output (also in Program.cs), so that anyone calling it can easily get the token
1
2
3
4
var tokenBytes = File.ReadAllBytes(e.FullPath);
....
var accessToken = Encoding.UTF8.GetString(tokenBytes);
Console.WriteLine(accessToken);
Not the most elegant solution, but I couldn’t think of anything better with the same very low amount of setup and high stability. If you have any ideas, please let me know.
Bringing it all together and why I did that
Now we know how we need to configure the managed identity and how the tool works, so the only task left is to put it all together. For that I have created an ARM template which includes the managed identity, the role assignment and calls my initialization script. That script creates some folders, downloads my tool (client and service) and sets up the service. All that is left to do is to bind the folder on the host to the container, so that the file exchange can happen and call the client in the container, both as seen in the TL;DR. The overall structure of the ARM template looks like this, created by the great ARM Template Viewer VS Code extension by Ben Coleman:
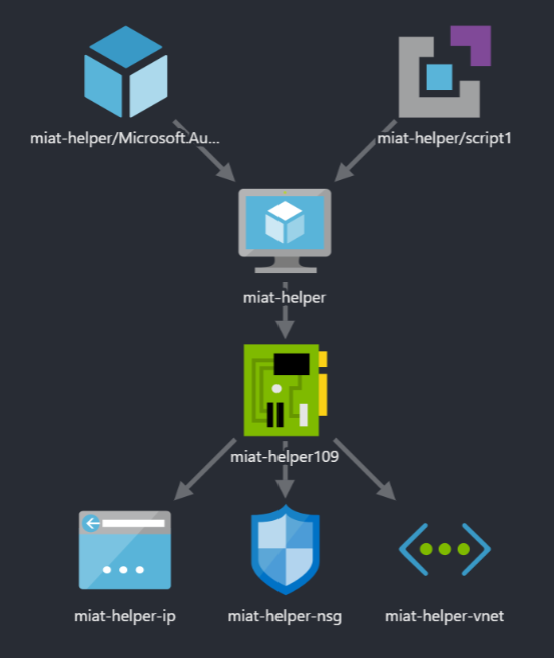
You can see the VM in the middle with the usual network setup of a network interface, a virtual network, a public IP address and a network security group below and the role assignment and the startup script above.
Overall it seems not that complicated but it took my a couple of tries to get it all right and stable. The reason for going there is that I presented a setup with a Docker Swarm that runs Business Central services in containers connected to Azure SQL on a couple of occasions during the last months. One of the things that bothered me with that setup was that I had to explicitely store the username / password of the SQL user, so I dug into managed identities to fix that and that worked out well in the end. Two more things to tackle (the Swarm join token needs to go into an Azure key vault and the Swarm worker nodes need to be Azure VM scalesets) and then I can share the whole setup.
Things I learned on the way
As is true a lot of the time when working with new technology, I learned a couple of things on the way:
- I decided to put my sources on Github for easy sharing and wanted to try Github actions for automated builds since they were announced. This little project gave me the chance and while the documentation is a bit thin, overall I like them a lot. If you want to take a look, you can find the actions GUI here and the scripts here. If I have the chance, I will probably stay with Azure DevOps pipelines as they are more mature and have more features, but if your code already is on Github, actions sure are a very nice way for automation
- Of course I run my builds in containers as well. Doing that I think I found a bug as doing a
dotnet publish -c Release /property:Version=...inside the .NET Core 3.1 SDK container doesn’t add the version information to the generated .exe file. Let’s see if I missed something or this indeed is a bug (or limitation) - Downloading the latest release of a particular file in a Github release is not easily done as you can reference them only including a particular version in the URL like e.g.
https://github.com/tfenster/miat-helper/releases/download/v0.6/client.exe. So I came up with this handy little PowerShell snippet to find out what the latest version is and download it:
1
2
$latestTag = (Invoke-WebRequest -UseBasicParsing -Uri "https://api.github.com/repos/tfenster/miat-helper/releases/latest" | ConvertFrom-Json).tag_name
Invoke-WebRequest -UseBasicParsing -Uri "https://github.com/tfenster/miat-helper/releases/download/$latestTag/client.exe" -OutFile "c:\miat-helper\bin\client.exe"
Webmentions:
 Kamil Sacek
 Simon
Simon


